
Image: Visual Overview of the MurmurHash3F Hashing Process
Published: January 9, 2026 at 9:06:44 PM UTC
Last updated: January 9, 2026 at 9:07:14 PM UTC
High resolution landscape infographic that visually explains the MurmurHash3F hash algorithm using simple blocks, arrows, and icons to illustrate data flow without low level technical detail.

Available versions of this image
The image files available for download below are less compressed and higher resolution - and as a result of that, higher quality - than the images embedded in articles and pages on this website, which are more optimized for file size in order to reduce bandwidth consumption.
Regular size (1,536 x 1,024)
Large size (3,072 x 2,048)
Very large size (4,608 x 3,072)
Extra large size (6,144 x 4,096)
Comically large size (1,048,576 x 699,051)
- Still uploading... ;-)
Image description
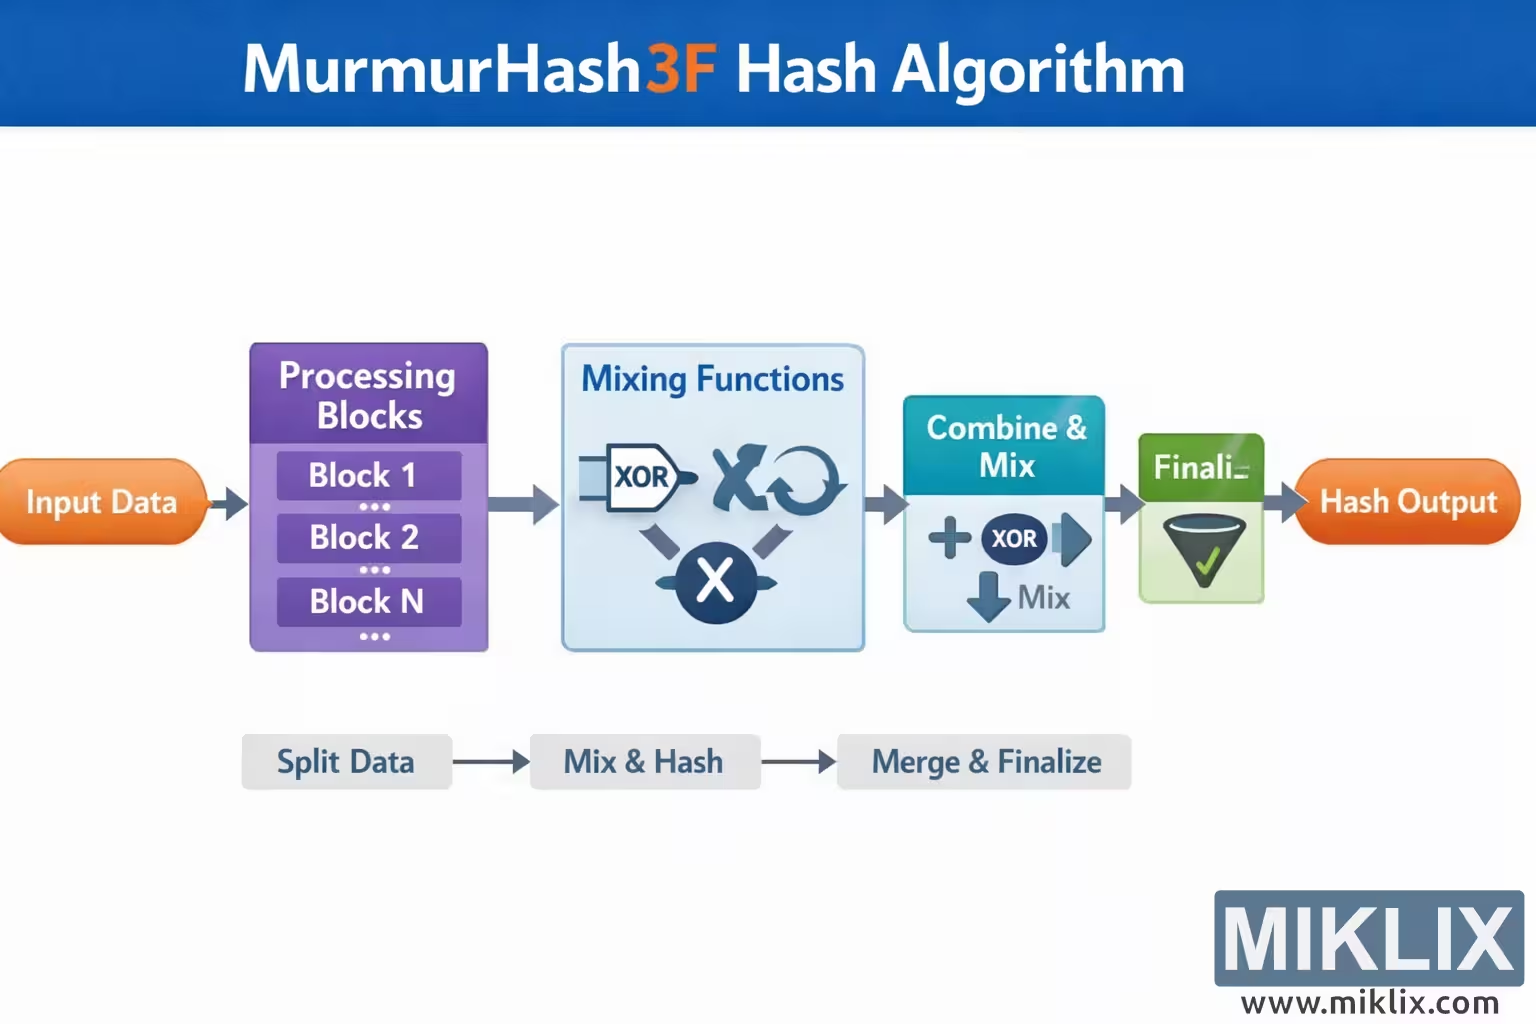
The image is a wide, landscape oriented infographic designed to provide an intuitive, non technical overview of the MurmurHash3F hashing process. At the very top spans a bold blue banner with the title "MurmurHash3F Hash Algorithm", where the "3F" is highlighted in orange to stand out visually from the rest of the white lettering. The background below the banner is clean white, helping the colored elements in the diagram remain clear and easy to follow.
The main flow of the diagram runs from left to right across the center of the image, connected by thick gray arrows that guide the viewer step by step. On the far left is an orange rounded rectangle labeled "Input Data", representing the raw bytes or message to be hashed. An arrow leads from this box into a tall purple panel titled "Processing Blocks". Inside this panel are three stacked sub boxes labeled "Block 1", "Block 2", and "Block N", with ellipses indicating that many blocks may exist. This panel conveys that the input is split into chunks for sequential processing, without exposing any exact block sizes or algorithm constants.
From the block processing panel, another arrow points to a large light blue rectangle labeled "Mixing Functions". This area contains simple abstract icons rather than exact formulas: a small plug shaped symbol with the text "XOR", a crossed tools style icon, a circular arrow suggesting rotation or iteration, and a round dark blue symbol with an X in the center. Together these icons communicate the idea that each block is transformed through several mixing operations that scramble the data to achieve good diffusion, but no precise implementation detail is implied.
The next stage is a teal colored rectangle titled "Combine & Mix". Inside it are a plus sign, a dark blue circle labeled "XOR", and a downward arrow with the word "Mix" beneath it. This section visually suggests that the results of processing individual blocks are combined together and mixed again to update the running hash state.
An arrow then leads to a smaller green box labeled "Finalization", illustrated with a funnel icon containing a green check mark. This represents the final cleanup and avalanche phase where the internal state is turned into the final digest. The last arrow leads into an orange rounded rectangle on the far right labeled "Hash Output", symbolizing the resulting hash value.
Below the main pipeline, a thin gray secondary flow summarizes the whole process in three compact steps: "Split Data", "Mix & Hash", and "Merge & Finalize", each inside soft gray rounded boxes connected by arrows. This lower strip acts as a legend or simplified overview for readers who only need the conceptual stages at a glance.
Overall, the design uses a restrained palette of blue, purple, teal, green, orange, and gray, with generous spacing and rounded corners to maintain a friendly, educational feel. The infographic avoids specific constants, bit widths, or low level mechanics, instead focusing on clearly communicating the high level stages involved in the MurmurHash3F hashing workflow.
The image is related to: MurmurHash3F Hash Code Calculator