
Image: Step-by-Step Guide to Preparing Ginger Rhizomes for Planting
Published: January 9, 2026 at 4:46:37 PM UTC
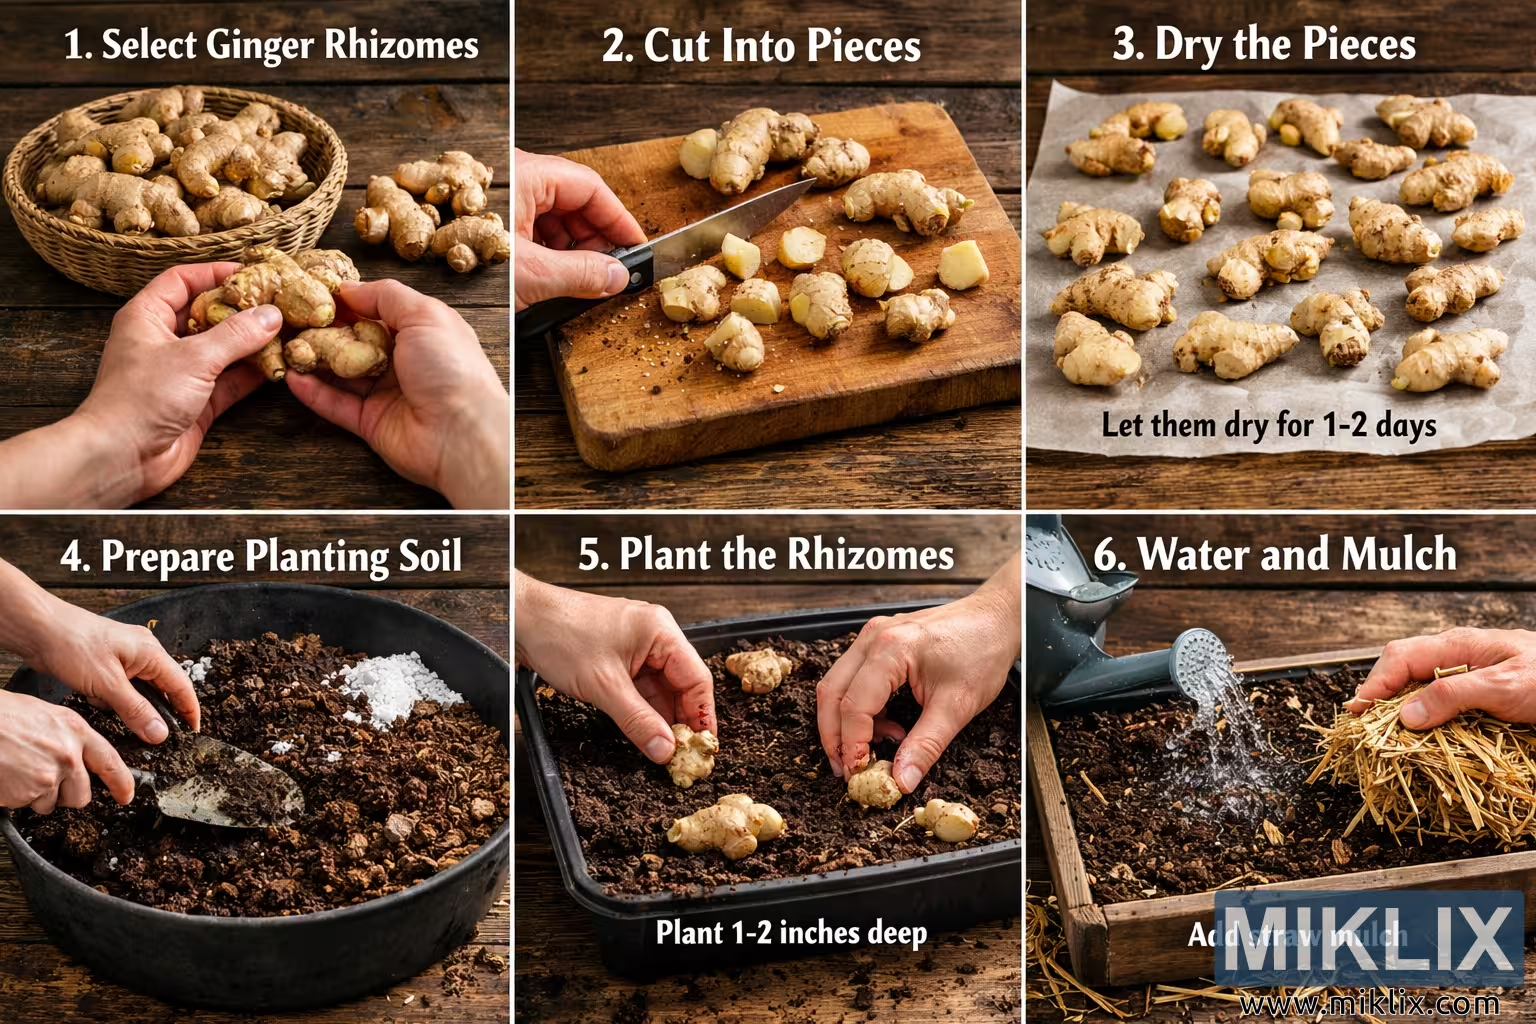
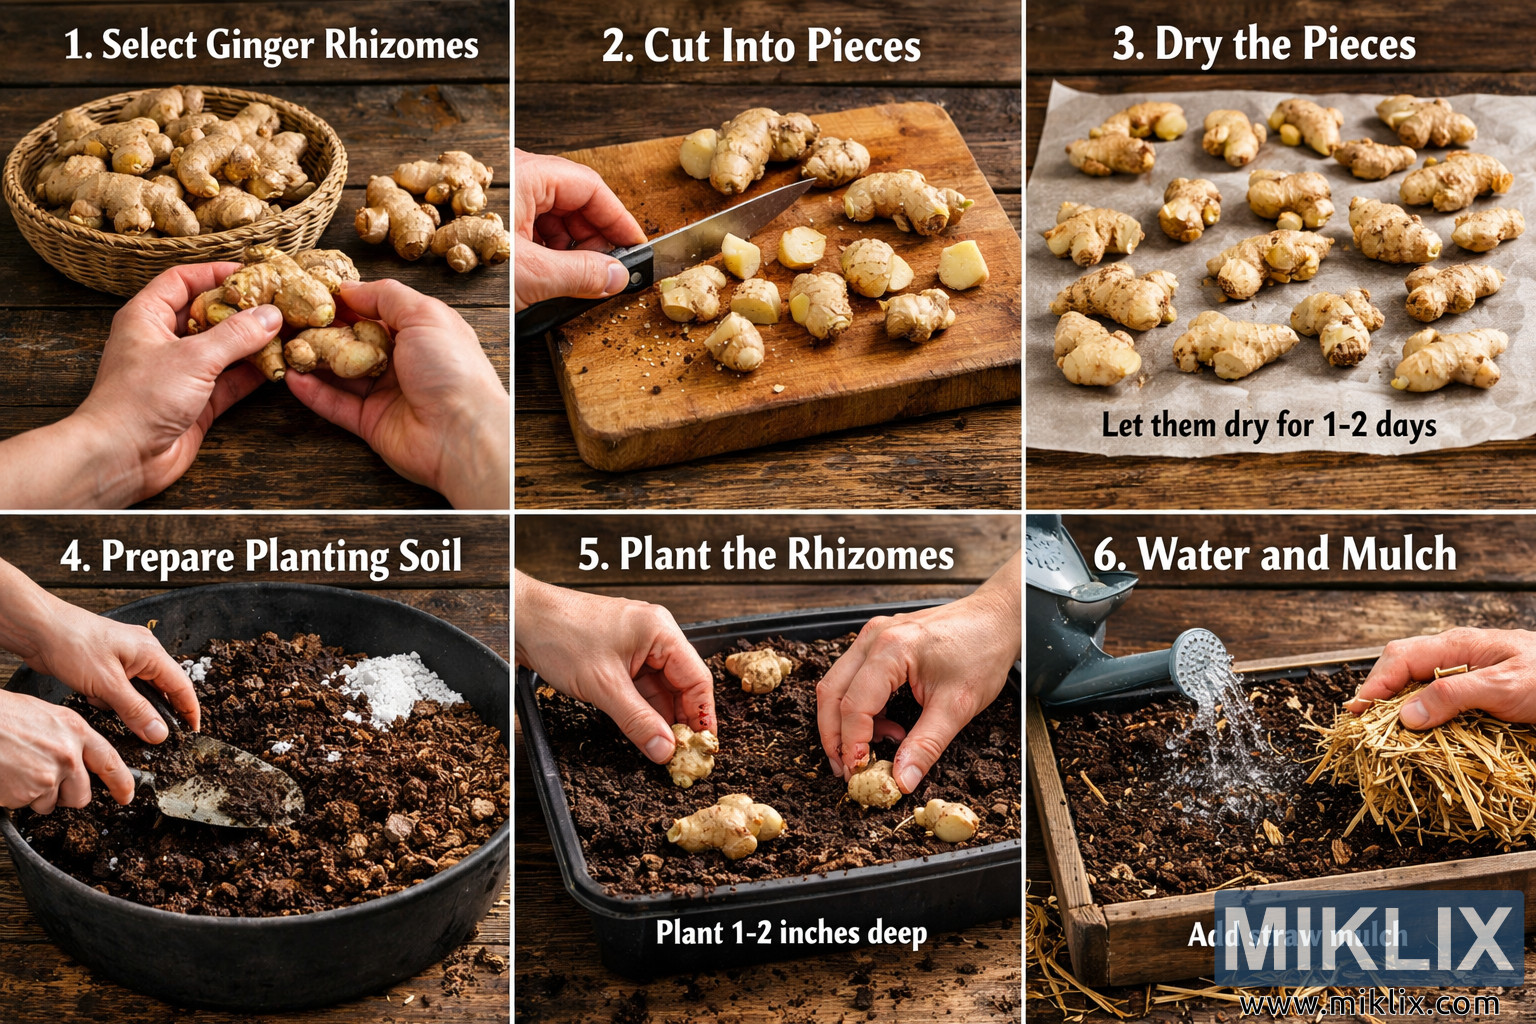
High-resolution instructional image illustrating the step-by-step process of preparing ginger rhizomes for planting, including cutting, drying, soil preparation, planting depth, watering, and mulching.

Available versions of this image
The image files available for download below are less compressed and higher resolution - and as a result of that, higher quality - than the images embedded in articles and pages on this website, which are more optimized for file size in order to reduce bandwidth consumption.
Regular size (1,536 x 1,024)
Large size (3,072 x 2,048)
Very large size (4,608 x 3,072)
Extra large size (6,144 x 4,096)
Comically large size (1,048,576 x 699,051)
- Still uploading... ;-)
Image description
The image is a high-resolution, landscape-oriented photographic collage composed of six clearly defined panels arranged in two horizontal rows of three. Together, the panels illustrate a step-by-step process for preparing ginger rhizomes for planting, presented in a practical, instructional style. The overall color palette is warm and earthy, dominated by browns, tans, and soft golden hues that emphasize natural materials such as wood, soil, and straw. The background throughout the collage is a rustic wooden tabletop, providing visual consistency and a farm-to-garden aesthetic.
In the first panel, labeled as the initial step, a pair of human hands holds a fresh ginger rhizome above a wooden surface. A woven basket filled with additional ginger pieces sits nearby. The rhizomes are plump, knobby, and light brown with subtle pinkish nodes, indicating freshness and viability for planting. The focus is sharp, highlighting the texture of the ginger skin and the natural imperfections that characterize living plant material.
The second panel shows the ginger being cut into smaller sections. A knife rests on a thick wooden cutting board, slicing the rhizome into chunks. Each piece contains at least one visible growth bud or eye. The hands are positioned carefully, suggesting precision and care. Small fragments of ginger skin and fibers are visible on the board, reinforcing the realism of the process.
In the third panel, the cut ginger pieces are spread out evenly on a sheet of parchment or paper towel. They are arranged with space between them to allow airflow. The lighting emphasizes the slightly moist, freshly cut surfaces. A short instructional note within the panel indicates that the pieces should be left to dry for one to two days, suggesting the curing process that helps prevent rot after planting.
The fourth panel transitions to soil preparation. A shallow container or pot filled with dark, rich potting soil is shown from above. A hand uses a small trowel to mix the soil, and white particles—likely perlite or another soil amendment—are visible throughout, indicating good drainage. The soil texture is loose and crumbly, suitable for ginger cultivation.
In the fifth panel, the ginger pieces are placed into the prepared soil. Hands gently set the rhizome sections into shallow depressions, spaced apart, with the buds facing upward. A subtle caption notes the planting depth of approximately one to two inches. The composition emphasizes careful placement rather than speed, reinforcing best gardening practices.
The final panel shows watering and mulching. A watering can pours a gentle stream of water onto the soil, while the other hand adds a layer of straw mulch on top. The straw is golden and dry, contrasting with the dark, damp soil beneath. This final step visually completes the planting process, signaling protection, moisture retention, and readiness for growth. Overall, the collage functions as a clear, visually engaging guide to preparing ginger rhizomes for successful planting.
The image is related to: A Complete Guide to Growing Ginger at Home