
Image: Step-by-Step Guide to Planting Aloe Vera in a Pot
Published: December 20, 2025 at 1:14:40 AM UTC
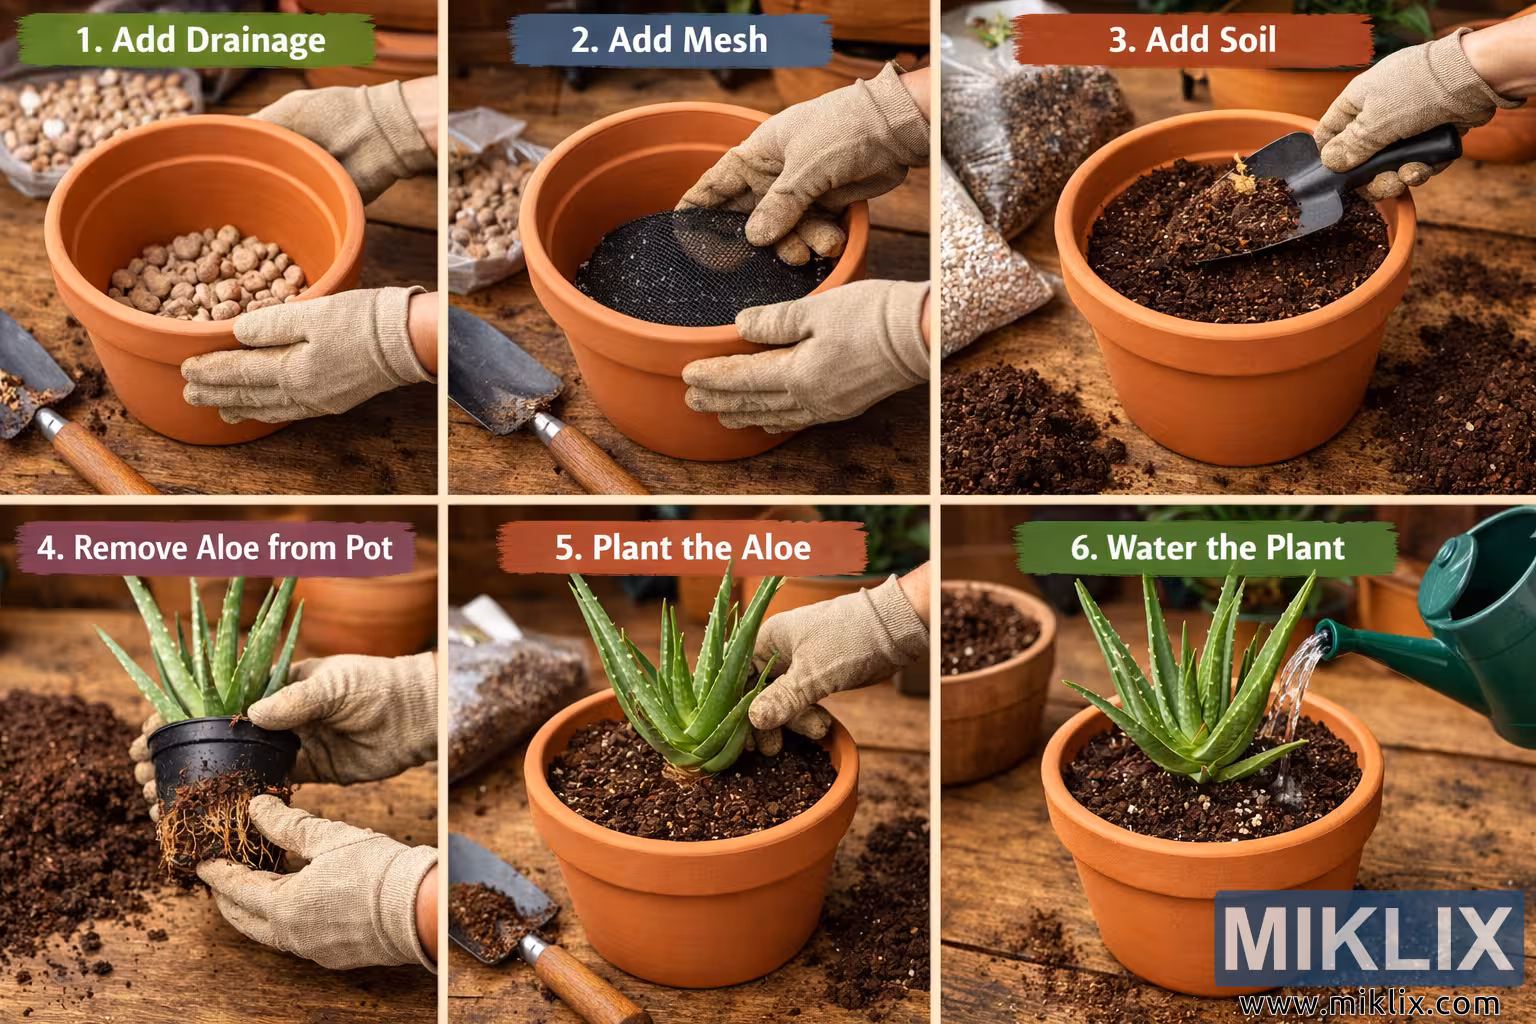
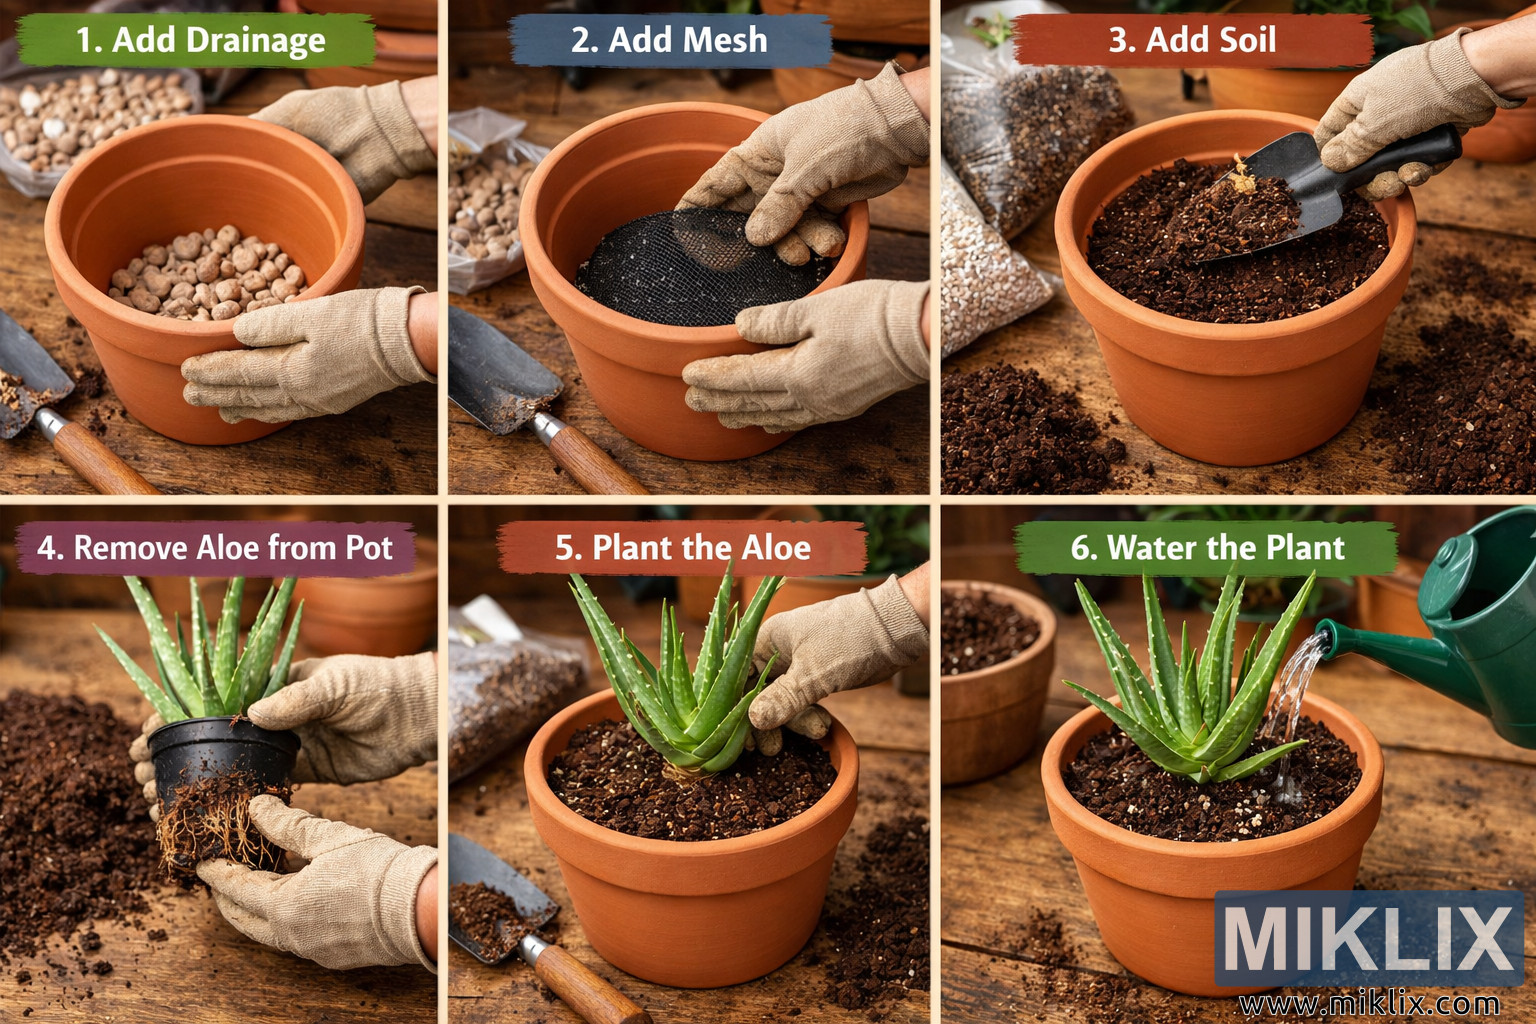
Visual step-by-step guide illustrating how to plant aloe vera in a pot with proper drainage, including adding pebbles, mesh, soil, planting, and watering.

Available versions of this image
The image files available for download below are less compressed and higher resolution - and as a result of that, higher quality - than the images embedded in articles and pages on this website, which are more optimized for file size in order to reduce bandwidth consumption.
Regular size (1,536 x 1,024)
Large size (3,072 x 2,048)
Very large size (4,608 x 3,072)
Extra large size (6,144 x 4,096)
Comically large size (1,048,576 x 699,051)
- Still uploading... ;-)
Image description
The image is a high-resolution, landscape-oriented photographic collage composed of six clearly separated panels arranged in two rows of three. Each panel documents a sequential step in the process of planting an aloe vera plant in a terracotta pot with proper drainage, creating a clear, instructional visual narrative. The setting is a rustic potting workspace with a warm-toned wooden table surface, scattered potting soil, gardening tools, and additional pots softly blurred in the background. Natural, diffused lighting highlights textures and colors, giving the scene an authentic, hands-on gardening feel.
In the first panel, a clean terracotta pot with a visible drainage hole is shown being filled with a layer of light-colored clay pebbles. Gloved hands gently hold the pot, emphasizing stability and care. A colored label at the top reads "1. Add Drainage," clearly identifying the step.
The second panel shows a circular piece of black mesh being placed on top of the clay pebbles. The mesh is carefully positioned by gloved hands to prevent soil from escaping while still allowing water to drain freely. The label "2. Add Mesh" appears prominently above the image.
In the third panel, dark, well-aerated potting soil is added into the pot using a small hand trowel. Loose soil is visible around the pot on the table, reinforcing the active planting process. The label "3. Add Soil" identifies this stage.
The fourth panel focuses on the aloe vera plant being removed from its original plastic nursery pot. The roots are visible, slightly compacted but healthy, and the gloved hands support the plant gently. The label "4. Remove Aloe from Pot" marks the transition from preparation to planting.
In the fifth panel, the aloe vera plant is positioned upright in the center of the terracotta pot. The fleshy green leaves fan outward symmetrically, contrasting with the dark soil. The hands adjust the plant to ensure proper depth and alignment. The label reads "5. Plant the Aloe."
The final panel shows the planted aloe being watered with a green watering can. A gentle stream of water flows onto the soil around the base of the plant, signaling completion of the process. The label "6. Water the Plant" appears at the top. Overall, the image conveys clarity, care, and practical guidance, making it ideal for gardening tutorials, educational content, or plant care resources.
The image is related to: A Guide to Growing Aloe Vera Plants at Home