
影像: Step-by-Step Watercress Planting Guide in Containers
已發佈:
最後更新: 2026年5月11日 晚上8:04:55 [UTC]
Visual step-by-step guide illustrating how to plant watercress in containers, including preparing soil, sowing seeds, watering, germination, growth, and harvesting.
Step-by-Step Watercress Planting Guide in Containers

此圖片的可用版本
以下可供下載的圖片檔案壓縮程度較低,解析度也較高 - 因此品質也較高 - 相較於本網站文章和網頁中內嵌的圖片,這些圖片的檔案大小經過優化,以減少頻寬消耗。
一般尺寸 (1,536 x 1,024)
大尺寸 (3,072 x 2,048)
非常大的尺寸 (4,608 x 3,072)
超大尺寸 (6,144 x 4,096)
超大尺寸 (1,048,576 x 699,051)
- 仍在上傳中... ;-)
圖片說明
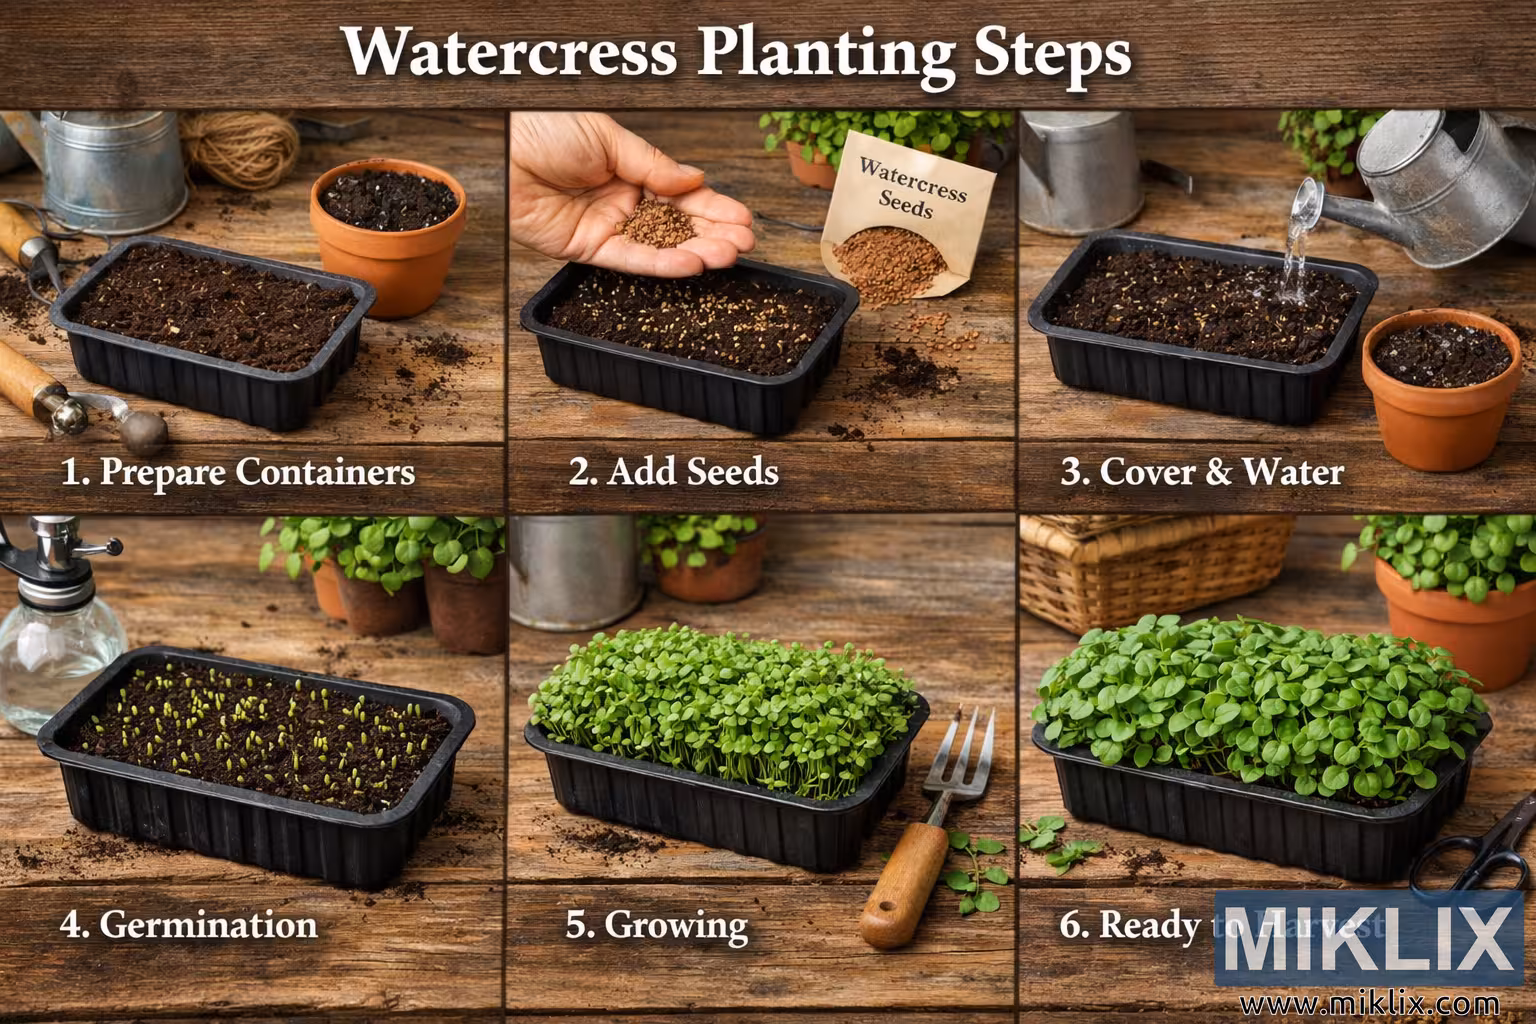
The image is a wide, landscape-oriented instructional collage titled "Watercress Planting Steps" that visually demonstrates the process of growing watercress in containers from seed to harvest. The collage is divided into six equal panels arranged in two rows of three, each panel representing a different stage in the planting and growing process. The entire scene is set on a rustic wooden gardening table with warm natural lighting that highlights earthy textures, dark soil, and the vibrant green color of the growing plants.
In the first panel, labeled "1. Prepare Containers," a shallow rectangular planting tray filled with moist potting soil sits on the wooden surface. Nearby are gardening tools and materials, including a small hand trowel, twine, and a metal watering can in the background. A small terracotta pot filled with soil is placed next to the tray, suggesting preparation and setup before planting begins.
The second panel, labeled "2. Add Seeds," shows a hand gently sprinkling tiny brown watercress seeds over the surface of the soil in the tray. A small paper packet labeled "Watercress Seeds" lies beside the container, with a few seeds scattered on the wooden surface. The focus emphasizes the careful sowing of seeds evenly across the soil.
The third panel, labeled "3. Cover & Water," depicts water being poured from a metal watering can onto the seeded tray. The soil appears slightly darker and damp as water flows gently onto the surface. The same terracotta pot remains nearby, maintaining continuity in the gardening workspace.
In the fourth panel, labeled "4. Germination," tiny green sprouts have begun emerging from the soil. The tray now contains dozens of small seedlings standing upright, indicating successful germination. A clear spray bottle sits next to the container, suggesting gentle watering and humidity maintenance during early growth.
The fifth panel, labeled "5. Growing," shows the plants becoming dense and leafy. The watercress has developed into a thick cluster of bright green shoots filling the tray. A small hand fork lies nearby, hinting at light maintenance and care as the plants mature.
Finally, the sixth panel, labeled "6. Ready to Harvest," displays fully grown watercress forming a lush, compact bed of fresh green leaves. Garden scissors rest on the wooden table beside the tray, implying the final step of cutting and harvesting the plants for consumption. The scene conveys freshness, abundance, and the completion of the planting cycle.
Across the collage, consistent lighting, gardening tools, and the rustic tabletop unify the panels into a cohesive instructional visual. The progression from bare soil to a thick carpet of edible greens clearly illustrates each stage of growing watercress in containers, making the image both educational and visually appealing for home gardeners.
圖像相關: How to Grow Watercress at Home: A Complete Beginner's Guide